

I've been working on a modern table recently and could do with some street furniture. I bought some from Armourcast (which I can highly recommend) but thought I would try my hand at building some myself.
 The following is how I made my skips. I don't pretend to be an expert but they came out ok, and were relatively simple to make.
I used the following materials:
- Sheet of 1mm thick plasticard (I didn't use the whole sheet)
- 1 pack of Plaststruct 4mm x 4mm square section rod. (You could use balsa wood for this, I did on an earlier version, it gives a slightly less sharp edge, but then it is a lot cheaper.)
.JPG) Insulating foam, I think a brand name is Kingspan, but any sort will do.
Insulating foam, I think a brand name is Kingspan, but any sort will do.- Milliput.
- Oddments of plasticard, balsa wood etc. For the filling of the skip, any off cuts will do, though corrugated textured looks good. I also used some copper foil.
- Paints and inks etc to suit your painting style.
.JPG)
Measure out the following rectangles on the plasticard: 70mm x 30mm twice, 50mm x 30mm and 22mm x 30mm twice.
Cut these out then take the two 70mm x 30mm rectangles. These will be the sides of the skip. Draw a line along each top corner of each square, 10mm from each corner. Then drawn another line along each bottom corner to join this and a point 10mm in from the side. This should give you the classic skip shape. (This is easier to do than explain, just copy the picture)
 Draw a line 12m up from the bottom on each side. I forgot to do this until later, but it would be much easier at this point.
Now glue these sections together. The 50mm x 30mm rectangle forms the bottom, the other two squares form the ends.
Now cut the following lengths from the plastruct rod:
- 2 x 50mm
- 4 x 40mm
- 4 x 13mm
- 2 x 60mm
- 4 x 14mm
- 2 x 20mm
- 8 x 6mm

Glue a 50mm length of plastruct rod along the top of each side, then glue a 14mm each side of this. Using some kind of cutting implement level the ends of these 14mm lengths off flush with the skip. I used a pair of clippers.

Next glue two 13mm lengths on each side, lying vertically downwards from the top piece. There is no real right or wrong place to put these as styles of skip differ greatly, but try and get them evenly spaced.
Now attach a 60mm length to each side, this should lie with it's top edge on the 12mm line you drew on the side earlier.
 Take the four 40mm lengths and glue them to the ends of the skip. One on the top of each side, and one half way down, joining the 60mm lengths.
 Glue the two 20mm lengths one on each end, directly under the lower 40mm length. Now glue four 6mm lengths under each of these then use your preferred cutting method to make them flush with the bottom of the skip. I'm not sure what this bit is for on a real skip, but they all seem to have them.
The basic build of the skip is now finished.

With milliput fill in some of the gaps between the lengths of plastruct rod.
Use some insulating foam to partially fill the skip. You don't need to do this, but unless you have shares in milliput you will find it cheaper to do so. The skip can be as full or empty as you wish, but try and make it a little irregular in shape.
 Now mix a big wodge of milliput and use 3/4 of it to cover the foam. I then gave it a rough dimpling (technical term) with the end of a paint brush.
 I now added my rubbish, a few balsa wood 'planks' a bit of corrugated plasticard and some copper foil to represent some tarp or similar draped over the edge. Didge them into the milliput.
 Now use the remaining 1/4 of the milliput to partially cover these, didge it with your paint brush. If I was doing this again, I'd spend a little longer at this stage and go over it again with a finer tool.
 After the milliput has dried I undercoated the whole thing in yellow. I used Montana Gold: Banana. This is a brand of spray paint aimed at graffiti and I bought mine at Hobbycraft (where I suppose most graffiti artists shop regularly) but they are also available straight from Montana's website, though Royal Mail's refusal to carry aerosols make postage quite expensive.
Generally I've found the Montana sprays cover well, although if you've scrawled numbers all over your plasticard in black biro then yellow is probably not the best colour to use. I did several coats and because I'm impatient put them on far too thickly. Don't so this.
.JPG) Next step is inking. I've found artists' ink works quite well and used a brilliant yellow all over the skip, but not the contents.
Next step is inking. I've found artists' ink works quite well and used a brilliant yellow all over the skip, but not the contents.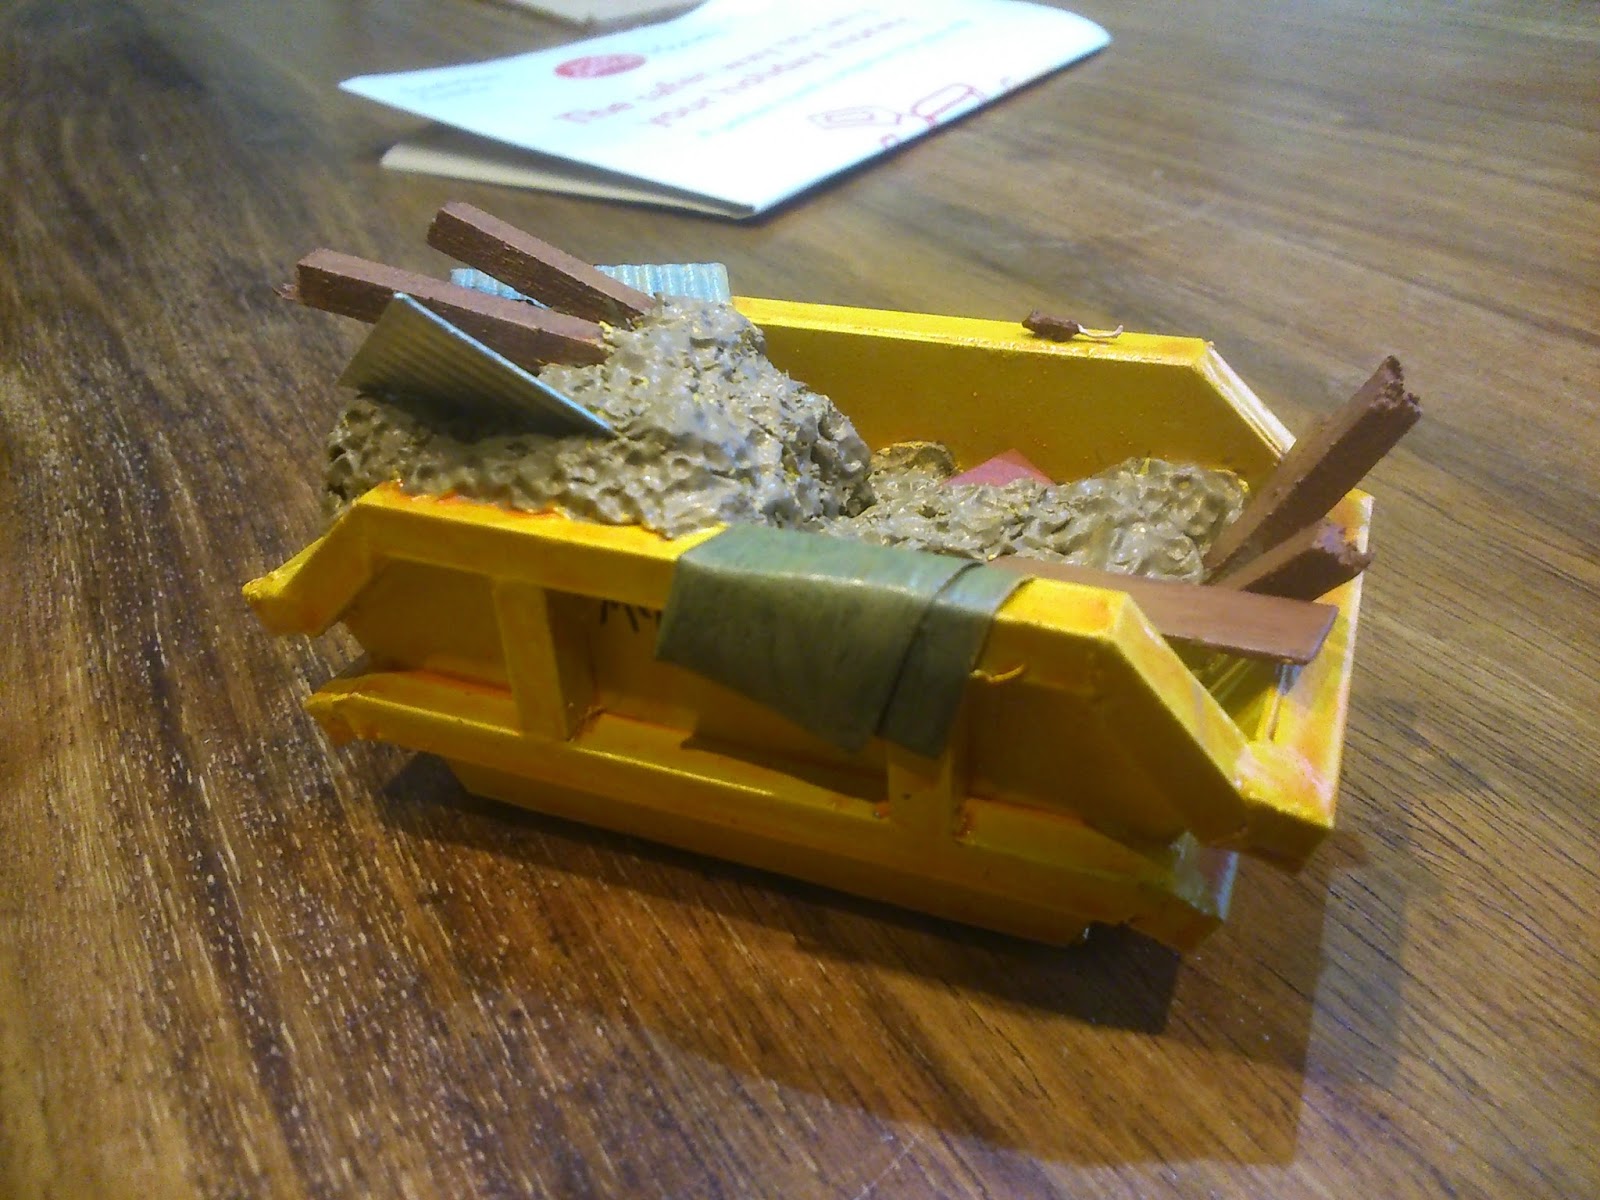 Then paint the contents of the skip with your favourite brand of paints. (I added a rat at this point, from a pack of animals by Mirliton.)
 And finally another inking.
Or rather this should be the final step. However I didn't appreciate how red my 'burnt umber' ink was. I'm not sure if this is a general trend with burnt umber or just with mine. I should have stopped much sooner, but I'm with Magnus Magnusson on this one and had liberally covered my whole skip with it before I decided it really wasn't working and had to soak it off in a mug of warm water.
Finally another inking. (This time with brown ink)
No comments:
Post a Comment